Choco Cornets

What are Choco Cornets?
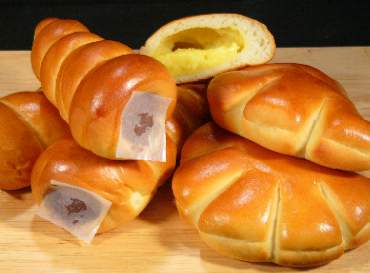
Chocolate cornets are delicious chocolate custards filled pastry cones. The custard is a smooth chocolate with pistachio nuts added for texture and flavor. It fills the cone to the brim for a rich taste of chocolate to go along with every bite of the pastry.
Ingredients
- Chilled mixing bowl
- Pastry cutter
- Metal cone
- Rolling pin
- Baking sheet
- Spoon
- Oven mitts
- Pastry bag with tip
- 2 cups of flour
- 1/4 teaspoon of salt
- 9 ounces of butter
- 1/4 cup lard
- Flour
- Butter
- 1/2 cup of Semi-sweet chocolate chips
- 1/3 cup of pistachio nuts
- 3/4 cup of heavy whipping cream
Directions
1. Preheat an over to 425 degrees F. In a refrigerator, chill a mixing bowl, 9 ounces butter and 1/4-cup lard for 30 minutes.2. Sift two cups flour and 1/4 tsp. salt into the chilled mixing bowl. Cut the chilled butter and lard into small cubes and add them to the flour. Mix the flour, butter and lard until it crumbs. Pour 5 tbsp. iced water into the mix and shape into a ball. Add more water 1 tsp. at a time if the dough fails to adhere into shape.
3. Apply a light dusting of flour over the ball of dough then wrap it in a sheet of wax paper. Chill the dough for 30 minutes.
4. Lightly flour a clean surface and place the dough in the center. Press the dough out into a rectangle with a thickness of about 3/4 inch. Dust both sides of the dough with flour then roll it into a strip about 20 inches long and 6 inches in diameter. Fold the strip over itself three times to create layers, and then roll it out again until it forms an 8-inch by 6-inch rectangle. Fold three more times into three layers then roll it back into the 8-inch by 6-inch rectangle. Do this twice more, each time returning it to the 8-inch by 6-inch size. With each fold and roll out, you create additional layers to the pastry.
5. Wrap the dough into another sheet of waxed paper then place in the refrigerator for one hour.
6. Place the dough onto a lightly floured work surface. Roll it into a thin oblong shape about 1/8-inch thick. Cut into strips 1-inch wide with a pastry wheel. Lightly dampen the strips with water and then coil them around a buttered cornet case. Begin wrapping the case at the pointed end, and overlap the pastry about 1/5 inch at the edges as you work your way to the large end of the cone shape.
7. Place the pastry wrapped cone onto a greased baking sheet, and then place the baking sheet onto a rack located in the center of the oven. Bake the pastry for 10 to 15 minutes or until golden brown. Remove the baking sheet from the oven using oven mitts to protect your skin from burns. Place the baking sheet onto a heat resistant surface. Allow the pastry to cool enough to touch.
8. Remove the metal cone from the center of the baked pastry cone surrounding it.
9. Melt 1/2 cup semi-sweet chocolate chips in a heavy saucepan on a stove set to medium-low heat. Stir the chocolate with a spoon while melting to prevent it from scorching. Add 3 tbsp. of orange juice to the melted chocolate then remove the saucepan from the stove.
10. Chop 1/3 cup of pistachio nuts into fine pieces as the chocolate begins to cool. Fold the chopped nuts into the chocolate.
11. Beat 3/4 cup heavy whipping cream in the chilled mixing bowl until it stiffens. Fold the cream into the chocolate mixture.
12. Fill a pastry bag with the chocolate mixture. Attach a tip wide enough to allow you to pope the chocolate through the opening securely. Fill the pastry with the chocolate to complete the cornet creation. Refrigerate until the chocolate sets before serving.
Tips & Warnings
Melt a bit more chocolate then spoon the melted chocolate over the top of the cornet in lines for an added bit of flavor and appearance.Chocolate cornets don't have to be filled with chocolate. It can also be filled with vanilla custard.
Sumber : http://japaneserecipes.wikia.com/wiki/Choco_Cornets
No comments:
Post a Comment